
I'm really happy to present to you a mini photo album that is call a star album. I'm not the one who invented this and I saw many tutorials on this topic.
It looked complicated at first but once I started to follow the steps, it was quite easy. I hope you enjoy this tutorial.
The gorgeous patterned paper I used in this project is Mintay by Karola, the Bloomville collection. If you are not familiar with this company, I invite you to visit http://www.mintaypapers.com/ to see all their gorgeous collections.


Here are the steps to make this album:
Step 1: Cardstock base
- Cut out 7 times 3" X 6" inches in light blue cardstock.
- Cut out 7 times 3" X 5 1/2" in light yellow cardstock.
- Cut out 7 times 2 3/4" X 5" in coordinating patterned paper.

- Score each rectangle in the middle with scoring board.

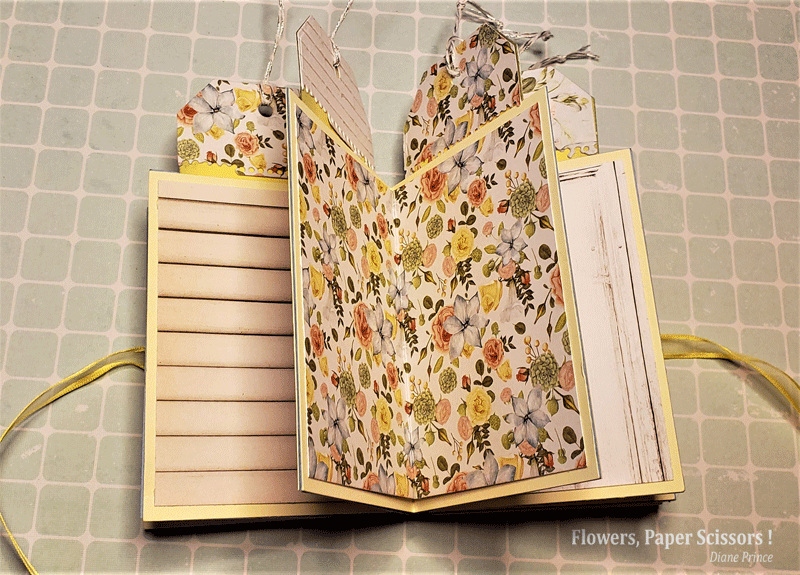
- With some Elizabeth Craft Designs Double Sided Adhesive Tape on the left and on the right side of the rectangles, adhere each light yellow piece onto the blue piece (as shown in the picture below) so that each side touches leaving a gap in the middle when it's open.

- Again with the tape, do the same thing with the patterned paper, leaving 1/8 of an inch on both sides.

- Give a good fold to each booklet.
- Again with the Elizabeth Craft Designs Double Sided Adhesive Tape, on the back of 6 out of 7 booklets, add the tape on the left edge and on the bottom, leaving 1/4 of an each towards the fold.

- Glue all the booklets one on top of the other.
- Decorate the front and the back of the album, making sure to glue down the ribbon before adhering the patterned paper. On this album, the picture of the front was embellished with some flowers from Elizabeth Craft Designs Cherry Blossom Branch #1732 . One big flower and two small ones were cut from this set and colored with Distress Ink. Green leafs were also added.
Front:

Back:

Step 2: Tags
- Using Elizabeth Craft Designs Planner Essentials 26 Planner Pocket 4 - Tag and Toppers #1744 dies set, die cut 6 of the smaller tag in the same yellow cardstock and 6 smaller topper in some coordinating cardstock.

- With a finger dauber and some Vintage Photo Distress Ink, shade the edges of the tags.

- Using some Elizabeth Craft Designs Double Sided Adhesive Tape, adhere the toppers on each tag.
- Tie a twig on top of each tag.
- With the Elizabeth Craft Designs Camera Insert Kit #1763, die cut the needed number of corners to old the small pictures on the tags and in the mini album.

- Tie a twig on each tag.

- Adhere the pictures on the tags.

Completed album look like a star when it is open like so:


I hope this tutorial gave you the motivation to try it ! Those albums are really fun to make and they can be very nice gifts to give to love ones !
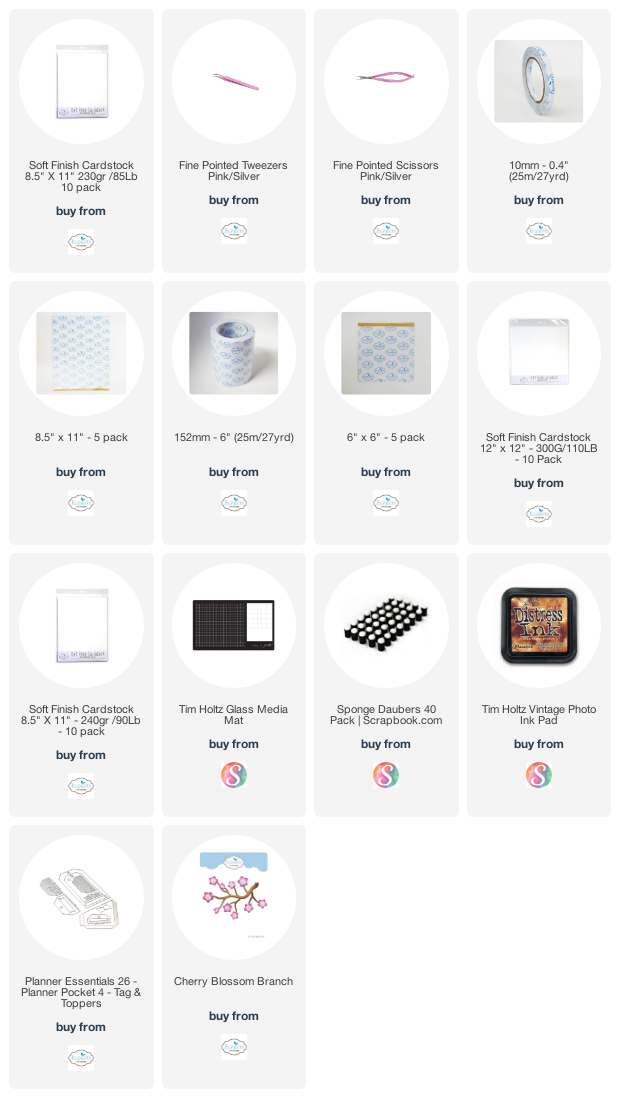
Here are the products I used on this album:
No comments:
Post a Comment