
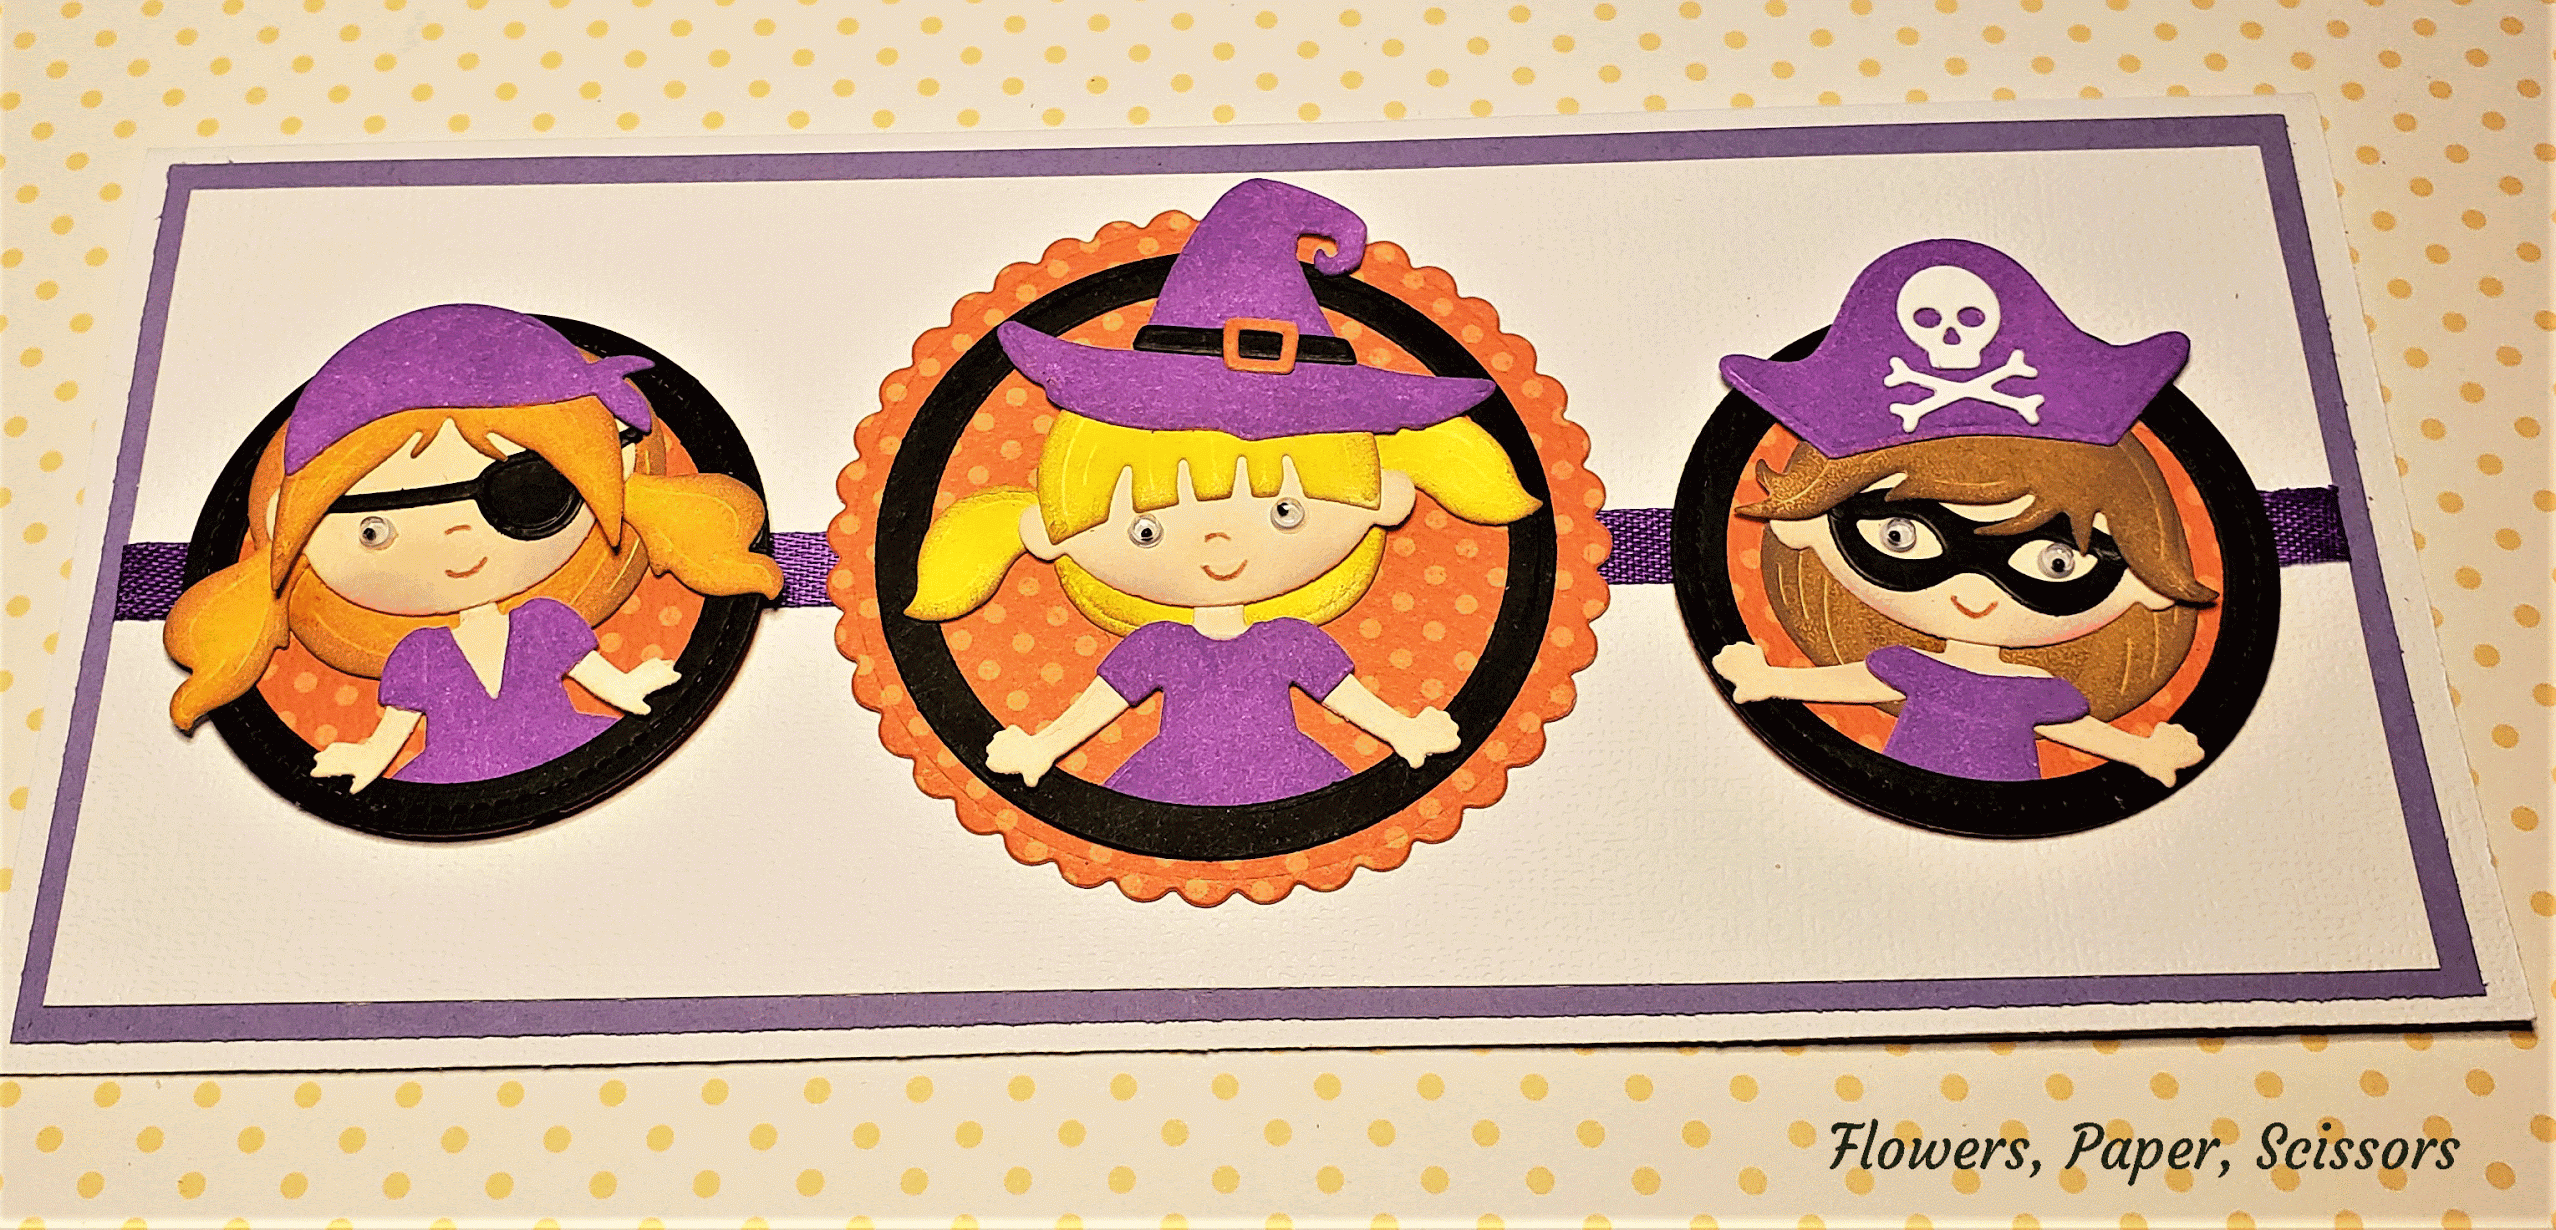
Hello everyone !
This morning I present to you an Halloween card with some Elizabeth Craft Designs dies from Joset's Storybook Collection. The format of this card is a "slimline card", that is the "new" thing in the handmade cards world so I decided to try that for a change and the little Halloween ladies was the perfect choice for this type of cards.
Here's the tutorial to make this card.
Step 1: Card Base
- This card measures 8 1/2" X 4", so you will need a 8 1/2" X 8" piece of Elizabeth Craft Designs White Soft Finish Cardstock.
- Cut a 8" X 3 1/2" purple rectangle cardstock.
- Cut a 7 1/2" X 3" White Soft Finish Cardstock.

- Fold the 8 1/2" X 8" in half on the 8" side, to make a 8 1/2" X 4" card.
- On the white cardstock, adhere a purple ribbon with some Clear Double Sided Adhesive across the card, in the middle (lengthwise).
- Using the ECD die set Pizza Box #1781, die cut one scalloped round in some orange cardstock, and two of the stitched circle die.
- Die cut some round frame in some black cardstock using the dies from the same die set. Use the two smallest round die and die cut 2 round frames and use the 2 smaller dies next to the scalloped one.

- Adhere everything on the card base using some Double Sided Adhesive Tape.

Step 2: Fairies and princess
- For this part, you will need a combination of dies from 3 die sets: Fairy 1 #1792, Fairy 2 #1793 and Princess #1790.
- Die cut all the parts for each of those 3 die sets in some White Soft Finish Cardstock doubled with some Double Sided Clear Adhesive Tape, like so :
Fairy 1:

Fairy 2:

Princess:

- For the Fairy 2, I used the hair of the Princess die set so that it would take less space on the card.
- For each girl, you will need an Halloween Accessory of your choice. I used the ones from the Halloween Accessories #1707.
- With some finger sponge daubers and some Distress Oxide, shade all the parts in some Halloween colors.
Assembling the fairies and princess:
- Using a pair of tweezers, adhere all the parts of each fairies and princess, except for the arms.

Fairy 1:
- Adhere the fairy in the black round frame with some Kids Choice Glue so that the head is sticking out.
- Glue the hands on the frame.

- Using a fine pointed scissors, cut the skirt that is hanging out of frame. Glue the girl with the frame on the orange circle.

Fairy 2:
- Do the same as we did for the first fairy.

Princess:
- Again, do the same for the princess.

- All 3 little girls done and ready to go on the card...

Finally, adhere the girls on the card base and Voilà !

Here's a closer look at the finish card.


List of products used on this card:
No comments:
Post a Comment