Monday, November 23, 2020

Vintage pick-up truck slimline card

 Hello everyone !


This vintage pick-up truck is such a great die set to use on Christmas cards and it is a die you can find at Elizabeth Craft Designs. Here's a card made with this die set.

Here's a quick tutorial on how to make this card.

Step 1: The card base

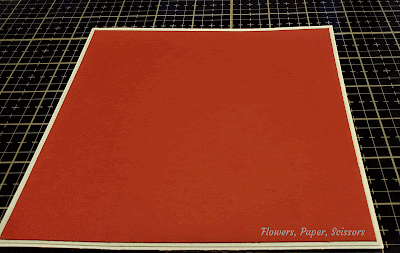
  • Cut a White Soft Finish 9 X 8 inches piece of cardstock , fold in half at 8 inches to make a 9 X 4 inches slimline card.
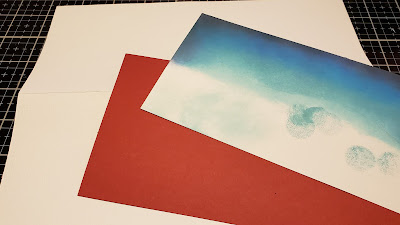
  • Cut a 8 3/4 X 3 1/2 inches red cardstock rectangle  and adhere on the card base with some Clear Double Side Adhesive Tape.
  • Cut 2 White Soft Finish Cardstock pieces measuring 8 1/2 X 3 1/2 inches.
  • On the top part of one of the white piece, using a sponge finger dauber  and some Distress Oxide, make a night sky (colors used here are Tumbled Glass, Broken China, Salty Ocean, Blueprint Sketch and Black Soot).


Step 2: The village

  • In the remaining white rectangle, die cut one strip of the house from the die set Village Edges #1691, on the right side of the card.
  • White some Fine Pointed Scissors, cut a hill shape on the left side.
  • In the back of the houses, glue a piece of yellow cardstock.
  • Mixed a small part of Cool Diamond Silk Microfine Glitter with some Transparent Crystal Craft Drops. Using a small brush, apply the mix in the windows. Let dry.
  • Using a make-up applicator, apply here and there some Tumbled Glass Distress Oxide.
  • Adhere the house strip on the card base with some Double Side Adhesive Tape, leaving a small opening to insert the trees from the next step.

Step 3: The pick-up truck

  • Using the Planner Essential 16 - Christmas Tree Page #1677 die set, die cut all the parts of the truck, the tree to put in the back of the truck and 5 other trees, in the colored cardstock of your choice.
  • Adhere all the parts of the truck.
  • On the trees trunks, draw a line with a brown marker.
  • Dip the edges of the trees in some Kid Choice Glue and in some Glitterbitz Frosty Sparkle,

Putting everything together:

  • Place the truck on the card and the trees in the background.
  • With some a fine pointed white marker, draw some lines on the truck (like snow traces).


And voilĂ  ! 
I hope you enjoyed this tutorial and come back to see me soon !

Products used on this card:

Sunday, November 15, 2020

Santa Tags


Hello everyone !

Today I present to you a special delivery I made for someone you needed tags. What better way to say Christmas than Santa in a chimney !

Here are the steps for making those tags:


Step 1: Tag base

  • Using some White Soft Finish Cardstock die cut twice the smallest tag from the set Planner Essentials 26 - Pocket 4 - Tags & Toppers #1744.
  • Put one tag aside to cover the back when all the inking is done.

  • On the front tag, using a finger dauber sponge, ink the top part of the tag to make a night sky with distress oxide (colors used here : Tumbled Glass, Broken China, Salty Ocean, Blue Print Sketch and Black Soot).
  • Once done with the colors, sprinkle some water here and there.
  • Let dry.


Step 2: The chimney

  • Cut a light grey piece of cardstock 2 1/4 X 1 1/2.
  • Using a embossing folder with some brick pattern, embossed the grey cardstock.
  • Using a finger dauber sponge, ink very lightly the front of the bricks with some Weathered Wood Distress Oxide.
  • Cut a dark grey piece of cardstock 2 3/4 X 3/4 inches.
  • Before all the other steps, double the colors cardstock you will use with some Clear Double Sided Adhesive Sheet. It will make it much easier to assemble everything. Also, on a small piece of White Soft Finish Cardstock, adhere some Clear Double Sided Adhesive on both sides of the cardstock. This will be to make the snow on the chimney.

  • Using the snow die cut in the Christmas Door #1689 set, die cut 3 pieces in the white cardstock with double sided adhesive on both sides.
  • Take off the release sheet on one side and dipped in some Cool Diamond Silk Microfine Glitter, burnish with the fingers until really shinny.

  • .Adhere the light grey piece on to the bottom of the tag.


  • With a finger sponge dauber shade the edges of the tag (including the chimney part) with some Black Soot Distress Oxide.


  • Adhere the dark grey piece on the chimney leaving the opening of the chimney unglued.


  • Release the back of the snow pieces and adhere to the dark grey piece of cardstock like shown in the picture


Step 3: Santa

  • Using Santa Claus #1567, die cut all the parts of the Santa, except the pants and shoes, in some colored cardstock double with the clear adhesive.
  • Color Santa's face using a finger dauber sponge, ink the face with some Tattered Rose Distress Oxide. Very lightly, had some Picked Raspberry Distress Oxide on the cheeks.
  • Color the eyes with a fine pointed black marker and make a small dot with a fine pointed white marker in each eye.


  • Assemble all the pieces of the Santa.


  • Insert the Santa in the chimney.
  • Glue some peel-off stars in the sky.
  • Attached a slim red ribbon and tie it.
  • Glue the back of the tag to the remaining tag with some Kids Choice Glue or some Double Sided Adhesive Tape.


Here's a final look on the finish tag.


And here, all package and ready to be delivered !


I hope you enjoy this tutorial, please join me again soon !

List of products used on this tag:


Wednesday, November 4, 2020

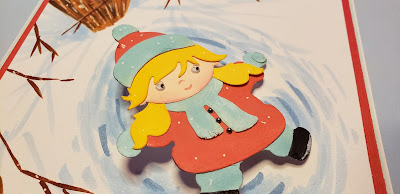
Snow Angels...or Snow Fox Angel ?

Hello everyone ! Now that Halloween as gone, time to focus on my favorite time of the year to make cards...and oh well...my favorite time of the year for a lot of things !

My inspiration came an artist that I love, Sandy Allnock. She made a video on coloring snow angels and I knew right away that I needed to apply that to some of the gorgeous characters from Elizabeth Craft Designs collection of dies. 

If you want to take a look at the video from Sandy, hop on over her YouTube channel here.


Here is my tutorial to make those 2 cards.

Step 1: Card base

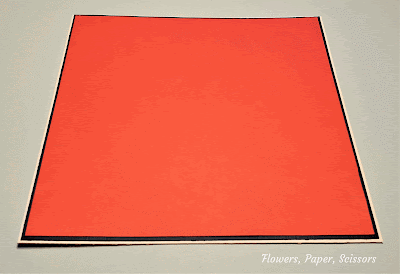
  • Both cards are the same size. They are a 6 X 6 inches cards. The little girl cards as a blue-green 5 7/8 inches square and a red 5 3/4 inches square. The fox as a dark blue  5 7/8 inches and a red 5 3/4 inches square.
  • Adhere all the layers on the card base for each card.


Step 2: Background

  • Cut a 5 1/2 square in some White Soft Finish Cardstock for each card.
  • Following Sandy Allnock instructions in her video, draw the tree in the corner of each card, using Copic Markers.


Step 3: Little Girl Angel

  • For the little girl, die cut the coat, pants and hat from the Santa Claus die set #1567.
  • Die cut the scarf from the Penguin die set #1566.
  • Die cut the pony tail from the Princess set #1790.
  • Die cut the face and the bangs from the Fairy 2 die set # 1793.
Everything is die cut from some White Soft Finish Cardstock doubled with some Clear Double Sided Adhesive.

  • Using some markers, color all the part of the girl and assemble.
  • Add some googly eyes and some small pearls to the coat to make buttons.


Step 4 Little Fox Angel

Also from some White Soft Finish Cardstock doubled with some Clear Double Sided Adhesive:

  • Die cut the fox from the Fox die set #1682, except for the body.
  • Using the Penguin die set #1566, die cut the body and the scarf.
  • Using some markers, color all the part of the fox and assemble.
  • Draw the mouth and the eyes of the fox, using a fine point black marker and make a white dot in the center of each eyes.


Step 5: Back to the background

  • On the back of the little girl and the fox, adhere a non-permanent tape and set on there card where you want them to lie.
  • Using Sandy's technique again, drawn the lines in the snow around the the characters to make them look as if they were making snow angels.
  • Once you are happy with how it looks, remove the tape on the back of the characters and adhere a mini action spring (Action Wobbles) on the back and than on to the card.
And we are done !!!


And a closer look:


I hope you enjoy this quick tutorial and come back to visit me very soon.


List of products used on this card: